This recipe is
great for a syrup to add to your tea or coffee for a little sweetness and
flavor. It’s really good for simple spells as well and can be put out as an
offering to fae and spirits alike. I like to add it to my tea at night for
visions while I sleep. I also have started using it as an offering to one of my
spirit companions and they love it.
1 cup water
2 cups white
granulated sugar or sugar substitute
3 tablespoons
– ½ cup lavender*
STEPS
Place water and lavender into a saucepan and bring to
a boil.
Add in sugar or sugar substitute; stir until the sugar
has dissolved completely before turning down the heat and allowing simmering
for 15 minutes
Make sure to stir it every so often as to make sure
nothing on the bottom burns
Remove from heat, cover, and allow the syrup to cool
for ½-1 hour. The longer that you let it sit the more intense the flavor it
will be.
Once it is cool, strain of the lavender and transfer into
a jar. Store in the fridge
*The more
lavender that you add the more intense the flavor will be as well. I personally
use ½ cup of lavender for a more intense smell and flavor. As well as let it
sit for an hour in the pot as it cools. The longer that you let it seep the darker the color will be too. It turns out to be a lovely purple color regardless.
Depending on the type of tea you use too will depend on
This is my go to tea when I’m having a particularly bad morning (or I’ve been having a rough week). It’s a great afternoon tea and taste perfect paired with some yummy homemade lemon cookies. ~ disclaimer ~
Ingredients
☀️ Black tea (loose or bag) – simulates your conscious mind which may help aid in clearing mental blockages.
☀️ 1 orange slice – promotes happiness
☀️ A few blueberries – protection from negative energy and thoughts
☀️ 1 strawberry (sliced) – attracts luck and positive energy
☀️ A teaspoon of honey – to bind your intentions and to ‘sweeten’ your current situation and mood
How I Make It
💛 I like just putting all my fresh fruits (and honey) in after the tea has done steeping for a few minutes. Something about actually seeing the bright colorful fruits in my tea adds to the happy feeling the tea itself gives me.
💛 But if you don’t like little bits floating around in your tea you could put the tea bag and the fruit together and steep them at the same time. Allow it to steep for at least 10 minutes, then strain out the fruit.
💛 You could also make a bigger patch of this tea and drink it cold. Though i would suggest just steeping the fruit and tea together and then straining out the fruit first before storing it in your fridge.
“You are braver than you believe, stronger than you seem, and smarter than you think.” – Winnie the Pooh
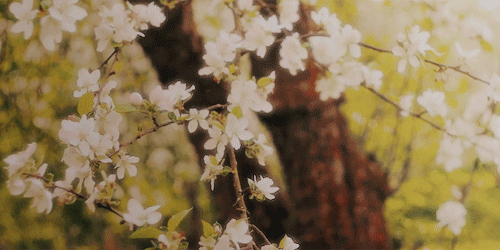
happy full moon in aries! today i am showing you guys how to make lavender milk ♡ lavender has been prized for centuries for its gentle healing properties & soothing fragrance. as most of you already know, every year i grow lavender in my garden. throughout the season i harvest the plant (when the purple flowers are bright and young), tie the branches together, and hang in a cool dark place to dry. the dried lavender can be used in beauty products, aromatherapy, baking, tea, herbal remedies, spiritual rituals, and in drinks! when ingested, lavender can help promote relaxation and sleep.
lavender milk is floral, pretty, and comforting. the flavour is at once fragrant and light from the flowers, but full, warm, and sweet from the milk and honey. i use nut milk (almond or cashew), because i think the nuttiness pairs well with the slightly bitter lavender, complimented by the addition of raw honey and pure vanilla extract. raw honey, ideally ethically and locally produced, still carries a range of health benefits that processed honey does not. it is antibacterial, antiviral, and soothing. give this recipe a try & experience the healing powers of drinking lavender ♡
ingredients:
♡ 1 cup nut milk (cashew or almond tastes best. if you’re allergic, you can use soy, rice, flax, or oat milk. you could also use a flavoured alternative milk- try vanilla!)
♡ 2-3 tablespoons of lavender, more or less depending on how strong you want the lavender flavour to be.
♡ 1 tsp of raw honey or more to taste
♡ ¼ tsp vanilla extract
directions:
in a small pot, combine milk and dried lavender. let simmer on low heat for about 10 minutes (do not boil- the goal is to achieve a nice infusion of lavender, which involves a longer, slower heating process. you don’t want to scorch the milk or flowers!), longer if you desire a stronger flavour. you’ll notice the lavender beginning to lose its colour. remove pot from heat, strain, and compost the flowers. while it’s still hot, dissolve a teaspoon or more of raw honey to taste, and add the ¼ teaspoon of vanilla extract. and there you have it, your own lavender milk! fragrant, soft, and delicate. let it lull you to sleep or incorporate it into your relaxation routine. you can try this recipe with a variety of other edible flowers, like rose, chamomile or borage, or a blend of flowers! nothing will make you feel more like a princess ♡
Harvest dandelions (from fields / lawns / gardens that haven’t been sprayed with chemicals) in a sunny day, not too early in the morning so that the dew has evaporated.
Only harvest full ones! They should be open and not have any dark spots. You can cut them just under the flower heads, as we’re only using the flowers.
How many you harvest is really up to you! Depends on how much oil you want to make / the size of your container. Please note that dried flowers take up wayyy less space than fresh ones so gather at least twice the size of your container if you want to fill it completely (it is not necessary though).
Step 2: Wash & Dry the dandelions
Dandelions are usually full of small insects. Be sure to wash them carefully, but don’t crush them! A good idea if you can’t get all the insects to come off is to leave the flowers spread out on a towel for a few minutes (not too long though) and see if insects come out of their own.
I know some people only let the flowers wilt overnight, but I prefer to let them dry longer, up to 3/ 4 days. This way mold won’t grow in the jar. Remember to place the flowers on a towel in an airy room, where they won’t be disturbed while they dry. Turn the flowers upside down after 1 day to help the drying process.
Step 3: Making Dandelion Oil
When the flowers are ready, put them in a jar and cover them with olive oil: you don’t have to fill the whole jar, just enough to cover the dandelions. Remove air bubbles with a knife and stir a bit.
Cover the jar with cheesecloth / cotton: this way, mold won’t form and ruin your oil. Tie the cloth with an elastic and place the jar in a sunny spot for 2 weeks. Do not leave it longer than that! Otherwise mold will grow.
After two weeks, strain the flowers: you can use a funnel to pour the oil in another bottle/jar.
The dandelion oil is ready! Do not leave it in the sun, and if possible store it in a dark glass bottle/jar.
Please remember that you must use it within a year of making it, so label the bottle! (Trust me, you will forget when you made it)
Are you a witch who has just experienced something infuriating, or perhaps being aggro as fuck is just your state of being?
MAKE FUCKING BREAD.
IT’S CHEAP, EASY, AND ENDS IN YOU HAVING FOOD IN YOUR FACE, WHICH WILL CURE YOU OF YOUR AGGRO IF IT IS CAUSED BY BEING HANGRY. IT’S BASICALLY THE BEST WAY TO BEAT THE SHIT OUT OF SOMETHING LEGALLY.
HOLY COW I LOVE KNEADING.
STICK HERBS IN YOUR BREAD FOR CALMING.
DRAW A SIGIL ON IT WHILE IT PROVES TO TRANSFER YOUR ANGER AWAY FROM YOU.
HOLY SHIT I LOVE MAKING BREAD.
Can we get some basic bread recipes for the witch who has never made bread before?
YOU FUCKING BET WE CAN.
I TOTALLY SUCK AT BAKING, BUT EVEN MY CONFUSED ASS WAS ABLE TO EXECUTE THIS EASY BREAD RECIPE LIKE A BOOOSSSSSS.
Here are a selection of simple and delicious recipes that are made mainly using the ingredients featured in my cheap vegan essentials list. The ingredients required which do not appear on this list are either cheap and widely available or are optional and easily substituted.